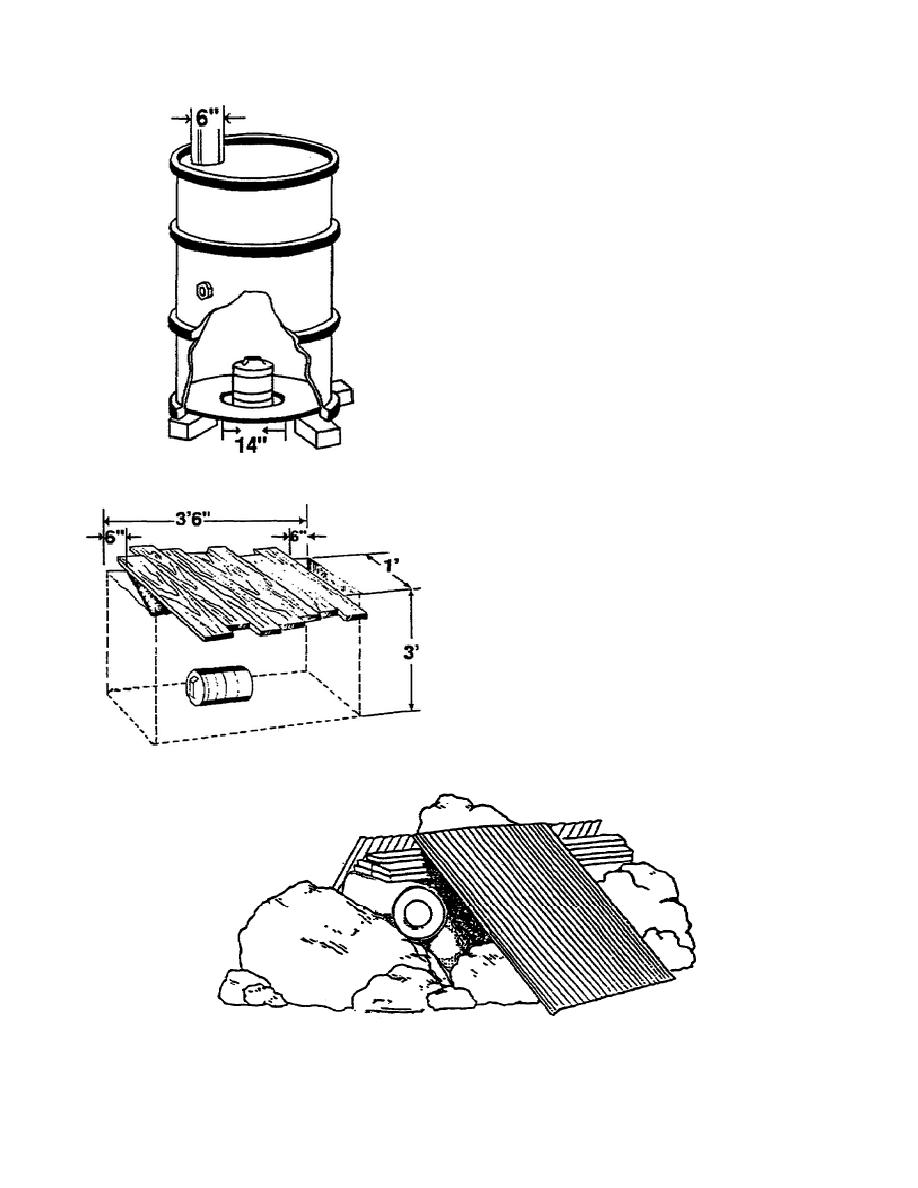
center of one end of the 55-gallon drum and a 6-inch (9-
centimeters) hole in the other end of the drum. The 6-
inch (9-centimeters) should be cut on one side of the end
as shown in Figure 9.
Step 2. Place the drum over the smoke pot, as
pictured.
Covered Trench Method. To use this method
follow three steps:
Step 1. Dig a trench approximately 3 1/2 feet (1
meter) long, 1 foot (.3 meter) wide, and 3 feet
(approximately 1 meter) deep. (The issue entrenching
tool is 2 feet long when unfolded.)
Step 2. Place the smoke pot on its side in the trench
and partially cover the trench with any suitable material.
Camouflage the position.
Step 3. Leave an opening on each side of the trench
for the emission of the smoke.
NOTE
Neither the drum nor the trench method will completely
screen the light from the burning smoke pots. Further,
Figure 9. Drum method.
when a burning smoke pot is enclosed in a shield, slightly
less smoke is produced than from an unshielded pot.
Compensation must be made for the reduction in smoke
by the use of additional smoke pots or reducing the
spacing interval.
During combat operation you may not have enough
time to construct smoke pot emplacements. You may
have to use smoke pots above ground. When smoke pots
are used on top of the ground, you should use flame
shields around individual smoke pots to hide their glare
from the enemy. Construct flame shields from rocks,
scrap iron, or any other nonflammable expedient. Figure
11 shows an example of using available materials to
conceal the glare from smoke pots. The smoke pot is
placed on the ground and the material is simply
Figure 10. Covered trench method.
Figure 11. On-top-of-the-ground method.
10


 Previous Page
