Step 8. Replace the gasket and bowl. Bold the bowl in place and turn the thumbscrew clockwise.
Tighten the thumbscrew finger-tight.
Step 9. Open the fuel valve by turning the handle counterclockwise.
Step 10. If fuel does not run into the fuel bowl when you open the fuel valve, loosen the thumbscrew
slightly to permit any trapped air to escape from the bowl. If the bowl does not fill with gasoline, notify
your supervisor.
Air Cleaner Element
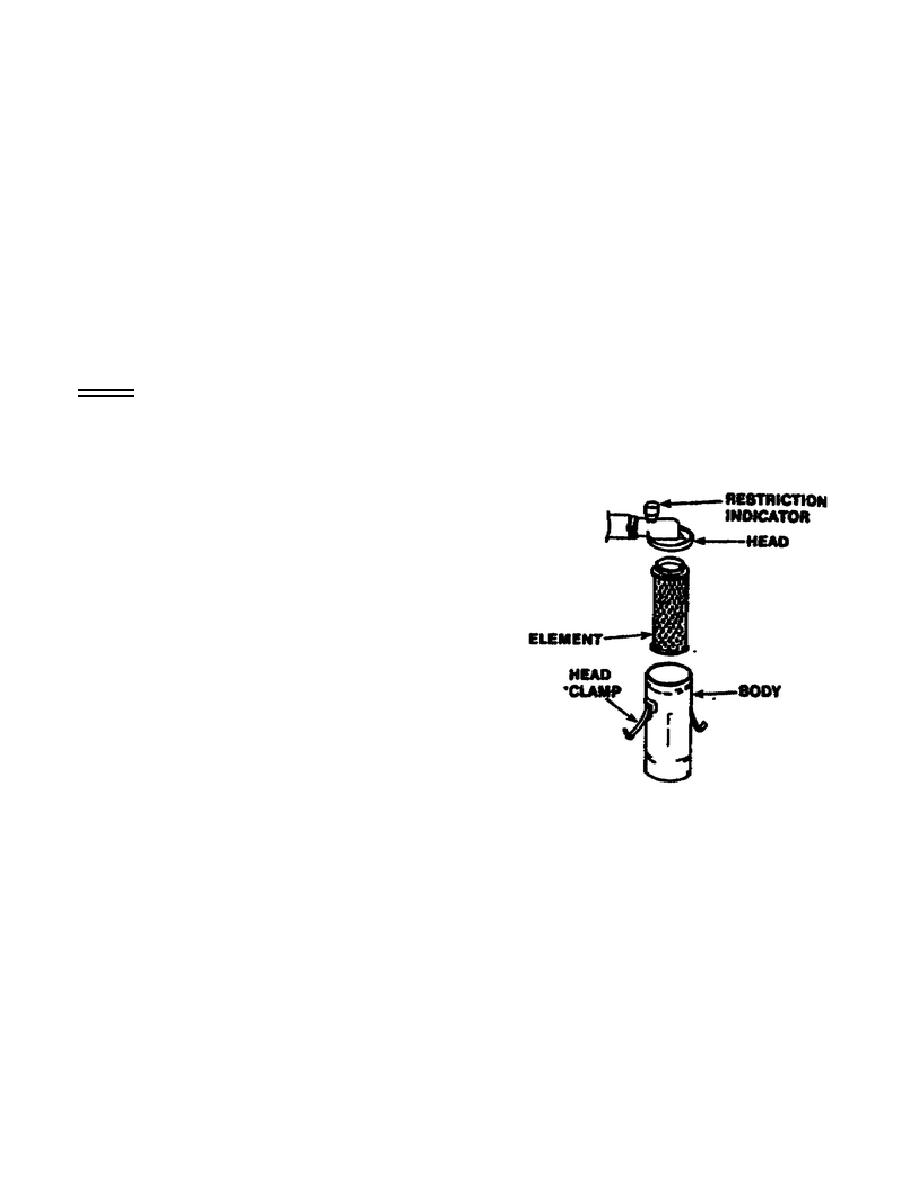
You can tell if the air cleaner element is serviceable by observing the restriction indicator on top of the
air cleaner head (Figure 18). When the restriction indicator shows red, change the cleaner element.
NOTE: The information on the instruction plate mounted on the air cleaner body says to "clean the
element with low air pressure and reuse." Do not clean the element; replace it with a new one.
To change the air cleaner element, proceed as follows:
Step 1. Disconnect the upper and lower air hose
clamps. Do this by turning the clamp screws
counterclockwise (Figure 18).
Step 2. Pull the upper and lower air hoses off the air
cleaner connector pipes.
Step 3. Disconnect the head from the body by
unlatching the two head clamps. Pull the head off the
body.
Step 4. Remove the cleaner element and throw it
away. Clean the head and body using low pressure
air and a clean cloth.
Step 5. Place the new cleaner element into the body
Figure 18. Air cleaner element.
and secure the head and body by latching the two
head clamps.
Step 6. Push the upper and lower air hose over the connector pipes and tighten the hose clamps by
turning the clamp screws clockwise.
Step 7. Reset the restriction indicator by pressing the reset button at the top of the restriction indicator.
Tank Unit Assembly
See that the exterior of the tank unit assembly is clean. See that the foot valve assembly is stowed
properly on the skid base and is held in place by the thumbscrew. Check that the tank drain valve opens
and
30


 Previous Page
